
Codea Craft 14 -- Starting with Terrain
I’ve been reading examples and searching the web about terrain generation and I’m ready to start sharing. Brace yourself, this gets pretty random
I’ve set our little Game-1 example aside. It needs some cleanup, certainly, but I feel it is well in hand. Our game will need better terrain than just a flat floor, so I’ve been looking into voxel terrain.
The estimable John Millard has written a comprehensive example, “Voxel Terrain”. It does a lot, supporting optional rivers, caves, mineral deposits, and trees. It’s good code but there’s a lot of it.
My approach over the past few days has been to split my time between working through the example, and reading web articles on terrain generation. There’s a fair amount out there, none of it quite targeted at what we’re doing, but it does give some background. I’ll try to remember to provide links to come of my bookmarks.
In reading John’s code, I came across questions, since the Craft stuff, especially voxels and noise, is pretty lightly documented. Another Codea forum member, Dave 1707, kindly answered some of my questions, and it looks like he got interested enough to code up some simple examples. Here’s a lightly-edited copy of one of his examples:
--displayMode(FULLSCREEN)

function setup()
    assert(OrbitViewer, "Please include Cameras (not Camera) as a dependency")
    scene = craft.scene()
    v=scene.camera:add(OrbitViewer,vec3(100,0,0), 200, 0, 10000)
    v.rx=30
    sprite()
    scene.voxels.blocks:addAssetPack("Blocks")
    dirtgrass = scene.voxels.blocks:new("DirtGrass")
    dirtgrass.setTexture(ALL, "Blocks:Dirt Grass")
    water = scene.voxels.blocks:new("Water")
    water.setTexture(ALL, "Blocks:Water")
    snow = scene.voxels.blocks:new("Snow")
    snow.setTexture(ALL, "Blocks:Snow")
    grass = scene.voxels.blocks:new("Grass Top")
    grass.setTexture(ALL, "Blocks:Grass Top")

    scene.voxels.visibleRadius=20
    scene.voxels:resize(vec3(30,1,30))
    scene.voxels.coordinates = vec3(100,0,100)

    offsetX=3
    offsetZ=1
    dirtLevel=25
    grassLevel=10
    waterLevel=2

    val=200
    m=1/val
    h=craft.noise.perlin()
    h.octaves     = 6   -- 6     -- amount of detail
    h.frequency   = 1.0 -- 1.0   -- first octave frequency?
    h.persistence = 0.5 -- 0.5   -- how rough is the noise
    h.seed        = 0   -- 0     -- random seed
    print(h.octaves, h.frequency, h.persistence, h.lacunarity, h.seed)
    --      6,         1.0,         0.5,           nil

    local yMin = 100
    local yMax = -100
    xx,zz=0,0
    for x=1,val do
        xx=xx+m
        zz=0
        for z=1,val do
            zz=zz+m
            local rawY = h:getValue(xx+offsetX,0,zz+offsetZ)
            yMin = math.min(yMin, rawY)
            yMax = math.max(yMax, rawY)
            y=math.abs(rawY)*50//1
            if y>dirtLevel then
                scene.voxels:fill("Snow")
                scene.voxels:block(x,y,z)
            elseif y>grassLevel then
                scene.voxels:fill("DirtGrass")
                scene.voxels:block(x,y,z)
            elseif y>waterLevel then
                scene.voxels:fill("Grass Top")
                scene.voxels:block(x,y,z)
            else
                scene.voxels:fill("Water")
                scene.voxels:block(x,waterLevel,z)
            end
        end
    end
    print(yMin, yMax)
end

function update(dt)
    scene:update(dt)
end

function draw()
    update(DeltaTime)
    scene:draw()
end
Here’s a picture of the output of the program:
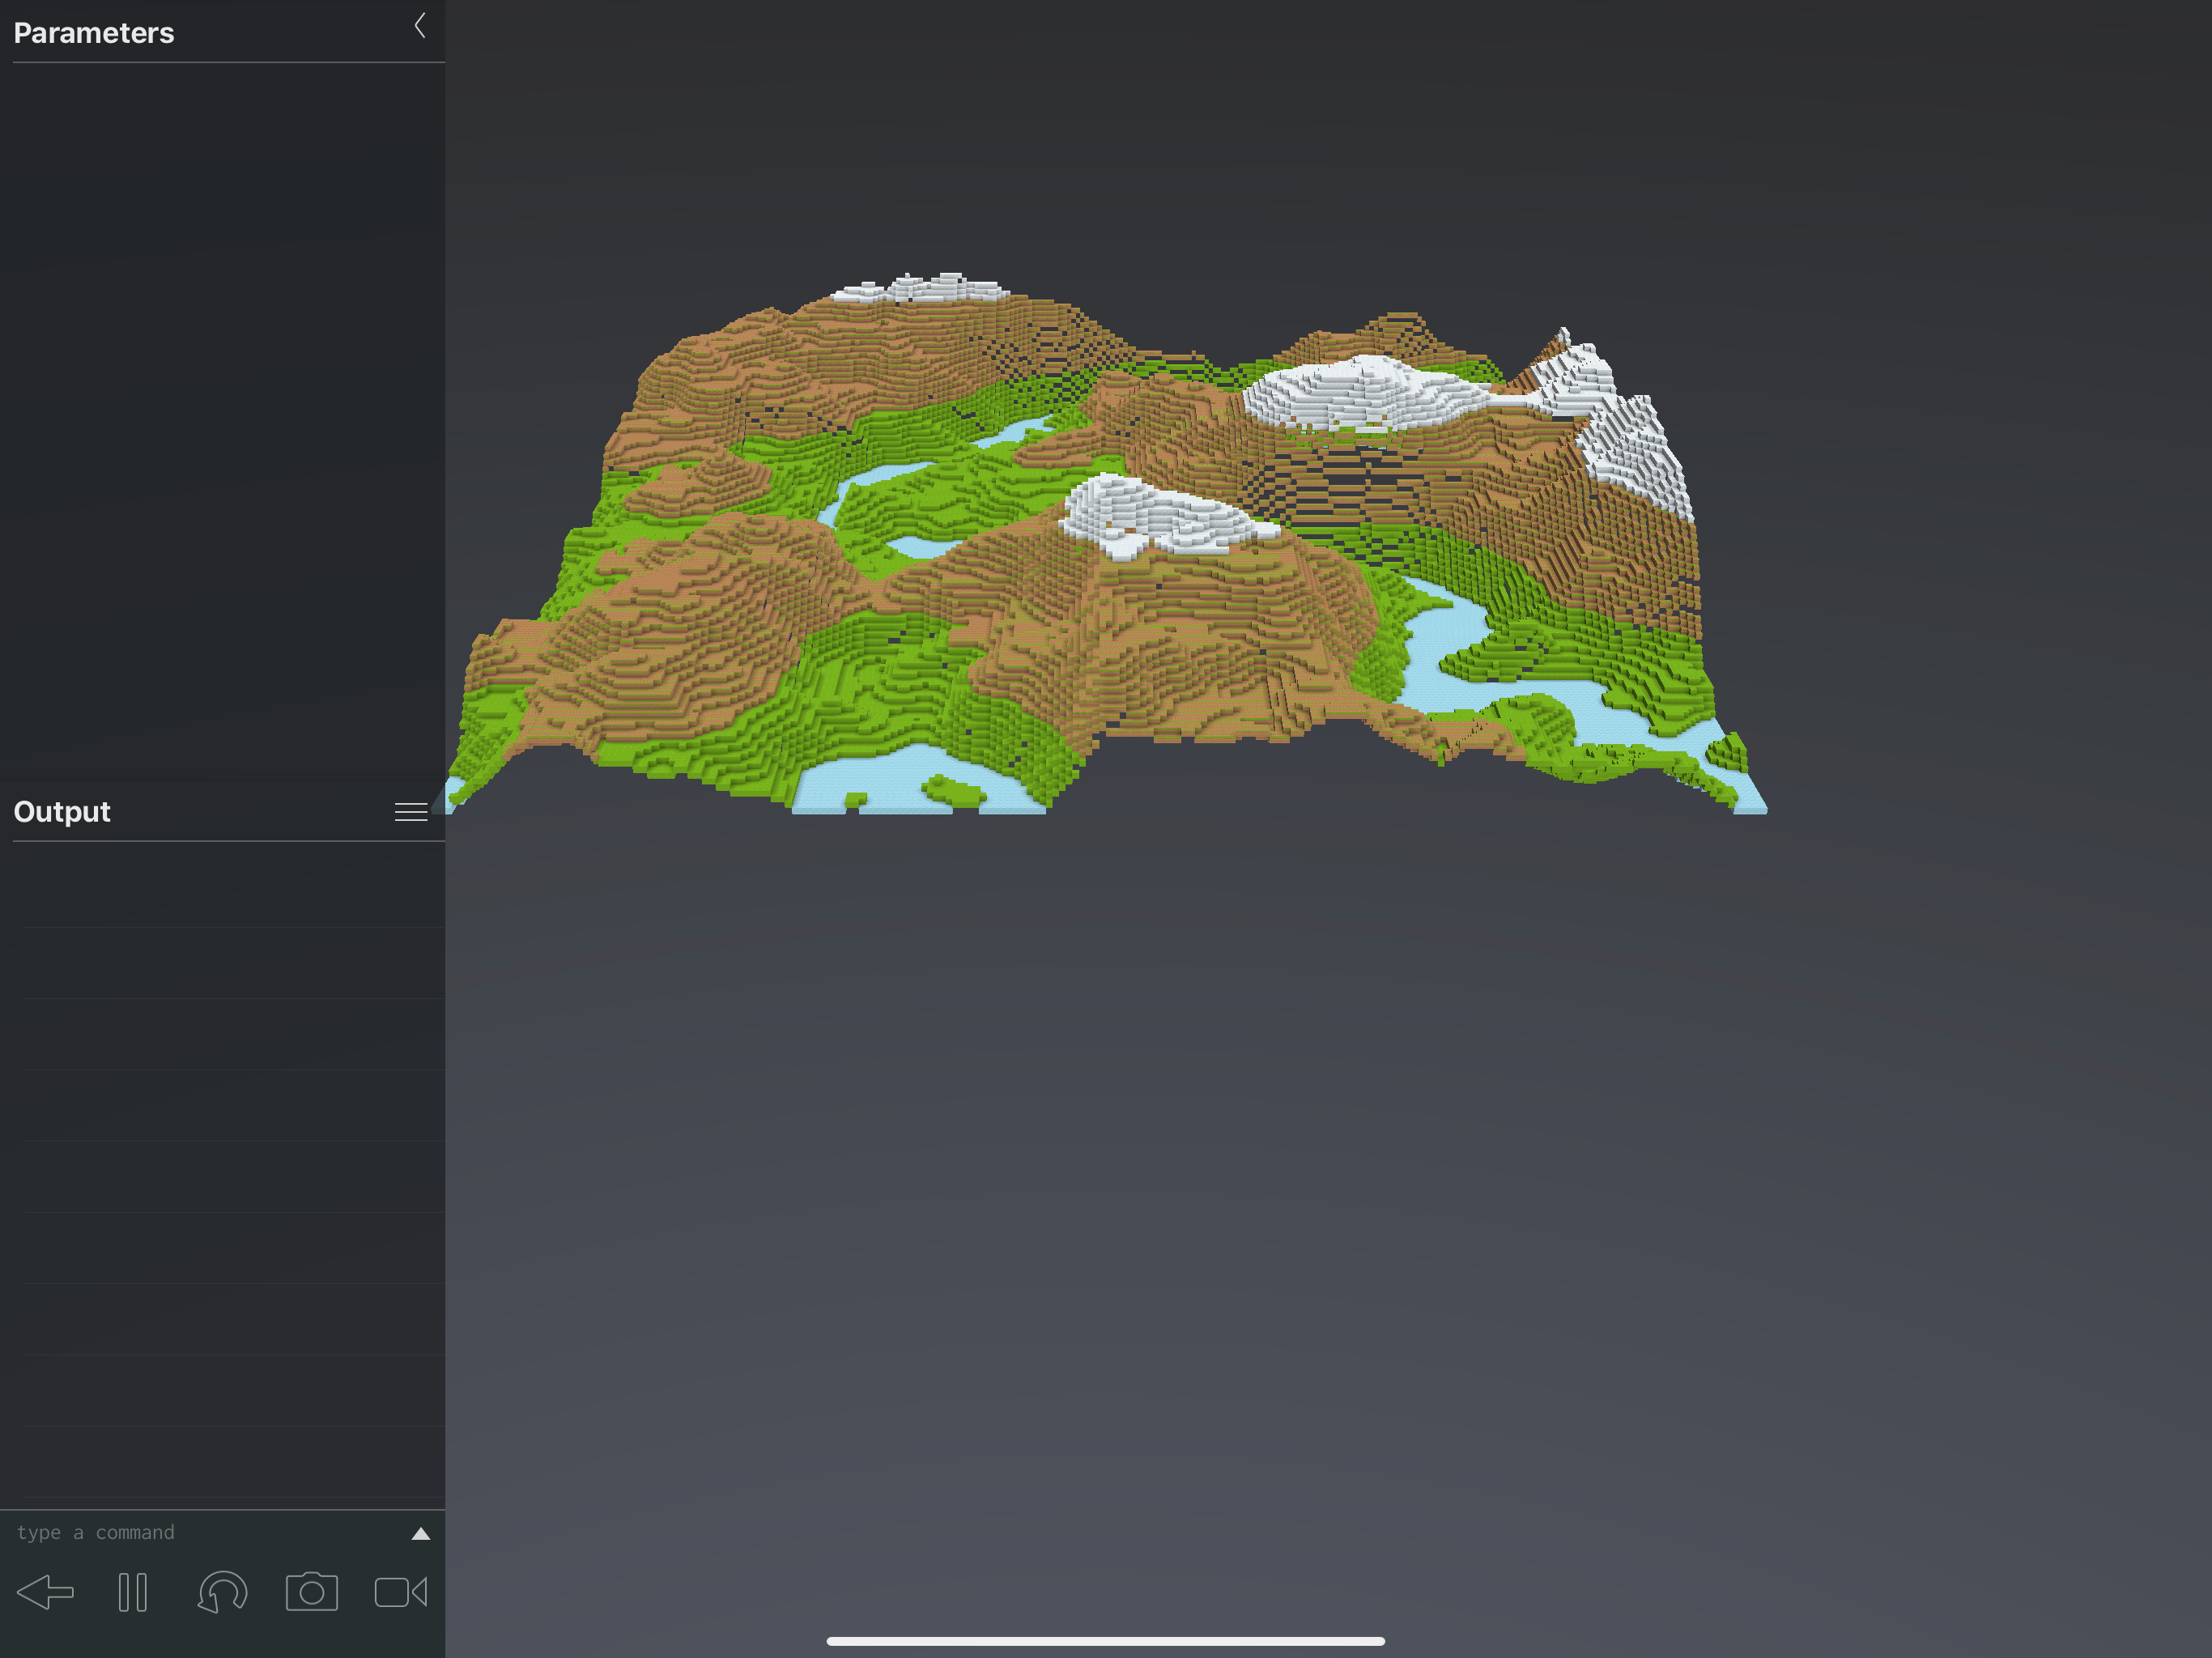
This looks a lot like terrain, with water and grassy dirt and snow-topped hills. Nice. How does it work?
Let me break down for you what’s going on here.
Basically the program computes 200x200 voxels. It gets a random y value (more about that in a moment), scales it by 50 (the random value is roughly between -1 and +1, and then he places a snow block if it’s “above dirt level”, a grassy dirt block if it’s above the grass level, a grass top block if it’s above water level, and a water block (at exactly water level) otherwise.
So tall numbers get snow, low ones get water, and so on. Pretty simple.
The random numbers come from a built-in “noise” function, craft.noise.perlin. Perlin noise, invented by Academy Award winner Ken Perlin. The award was won for technical achievement because Perlin noise lets computers generate very natural-looking textures, including landscapes.
The useful aspect of Perlin noise is that while it is quite random over a large scale, at a small scale it is coherent. The effect is that instead of leaping from min to max and everywhere in between, samples near to each other have similar values. Terrain generated this way rises and falls smoothly, resulting in fairly decent terrain such as seen in our picture above.
If you read Dave’s example carefully, you’ll see that he is sampling the noise at intervals of 1/200, in whatever range it starts at, presently X=3, Z=1. So he’s pulling 200 points between (3, 1) and (4, 2). Very close together.
If we double that 1/200 step, we get a picture like this:

And if we step by 1/20 instead of 1/200, it looks like this:
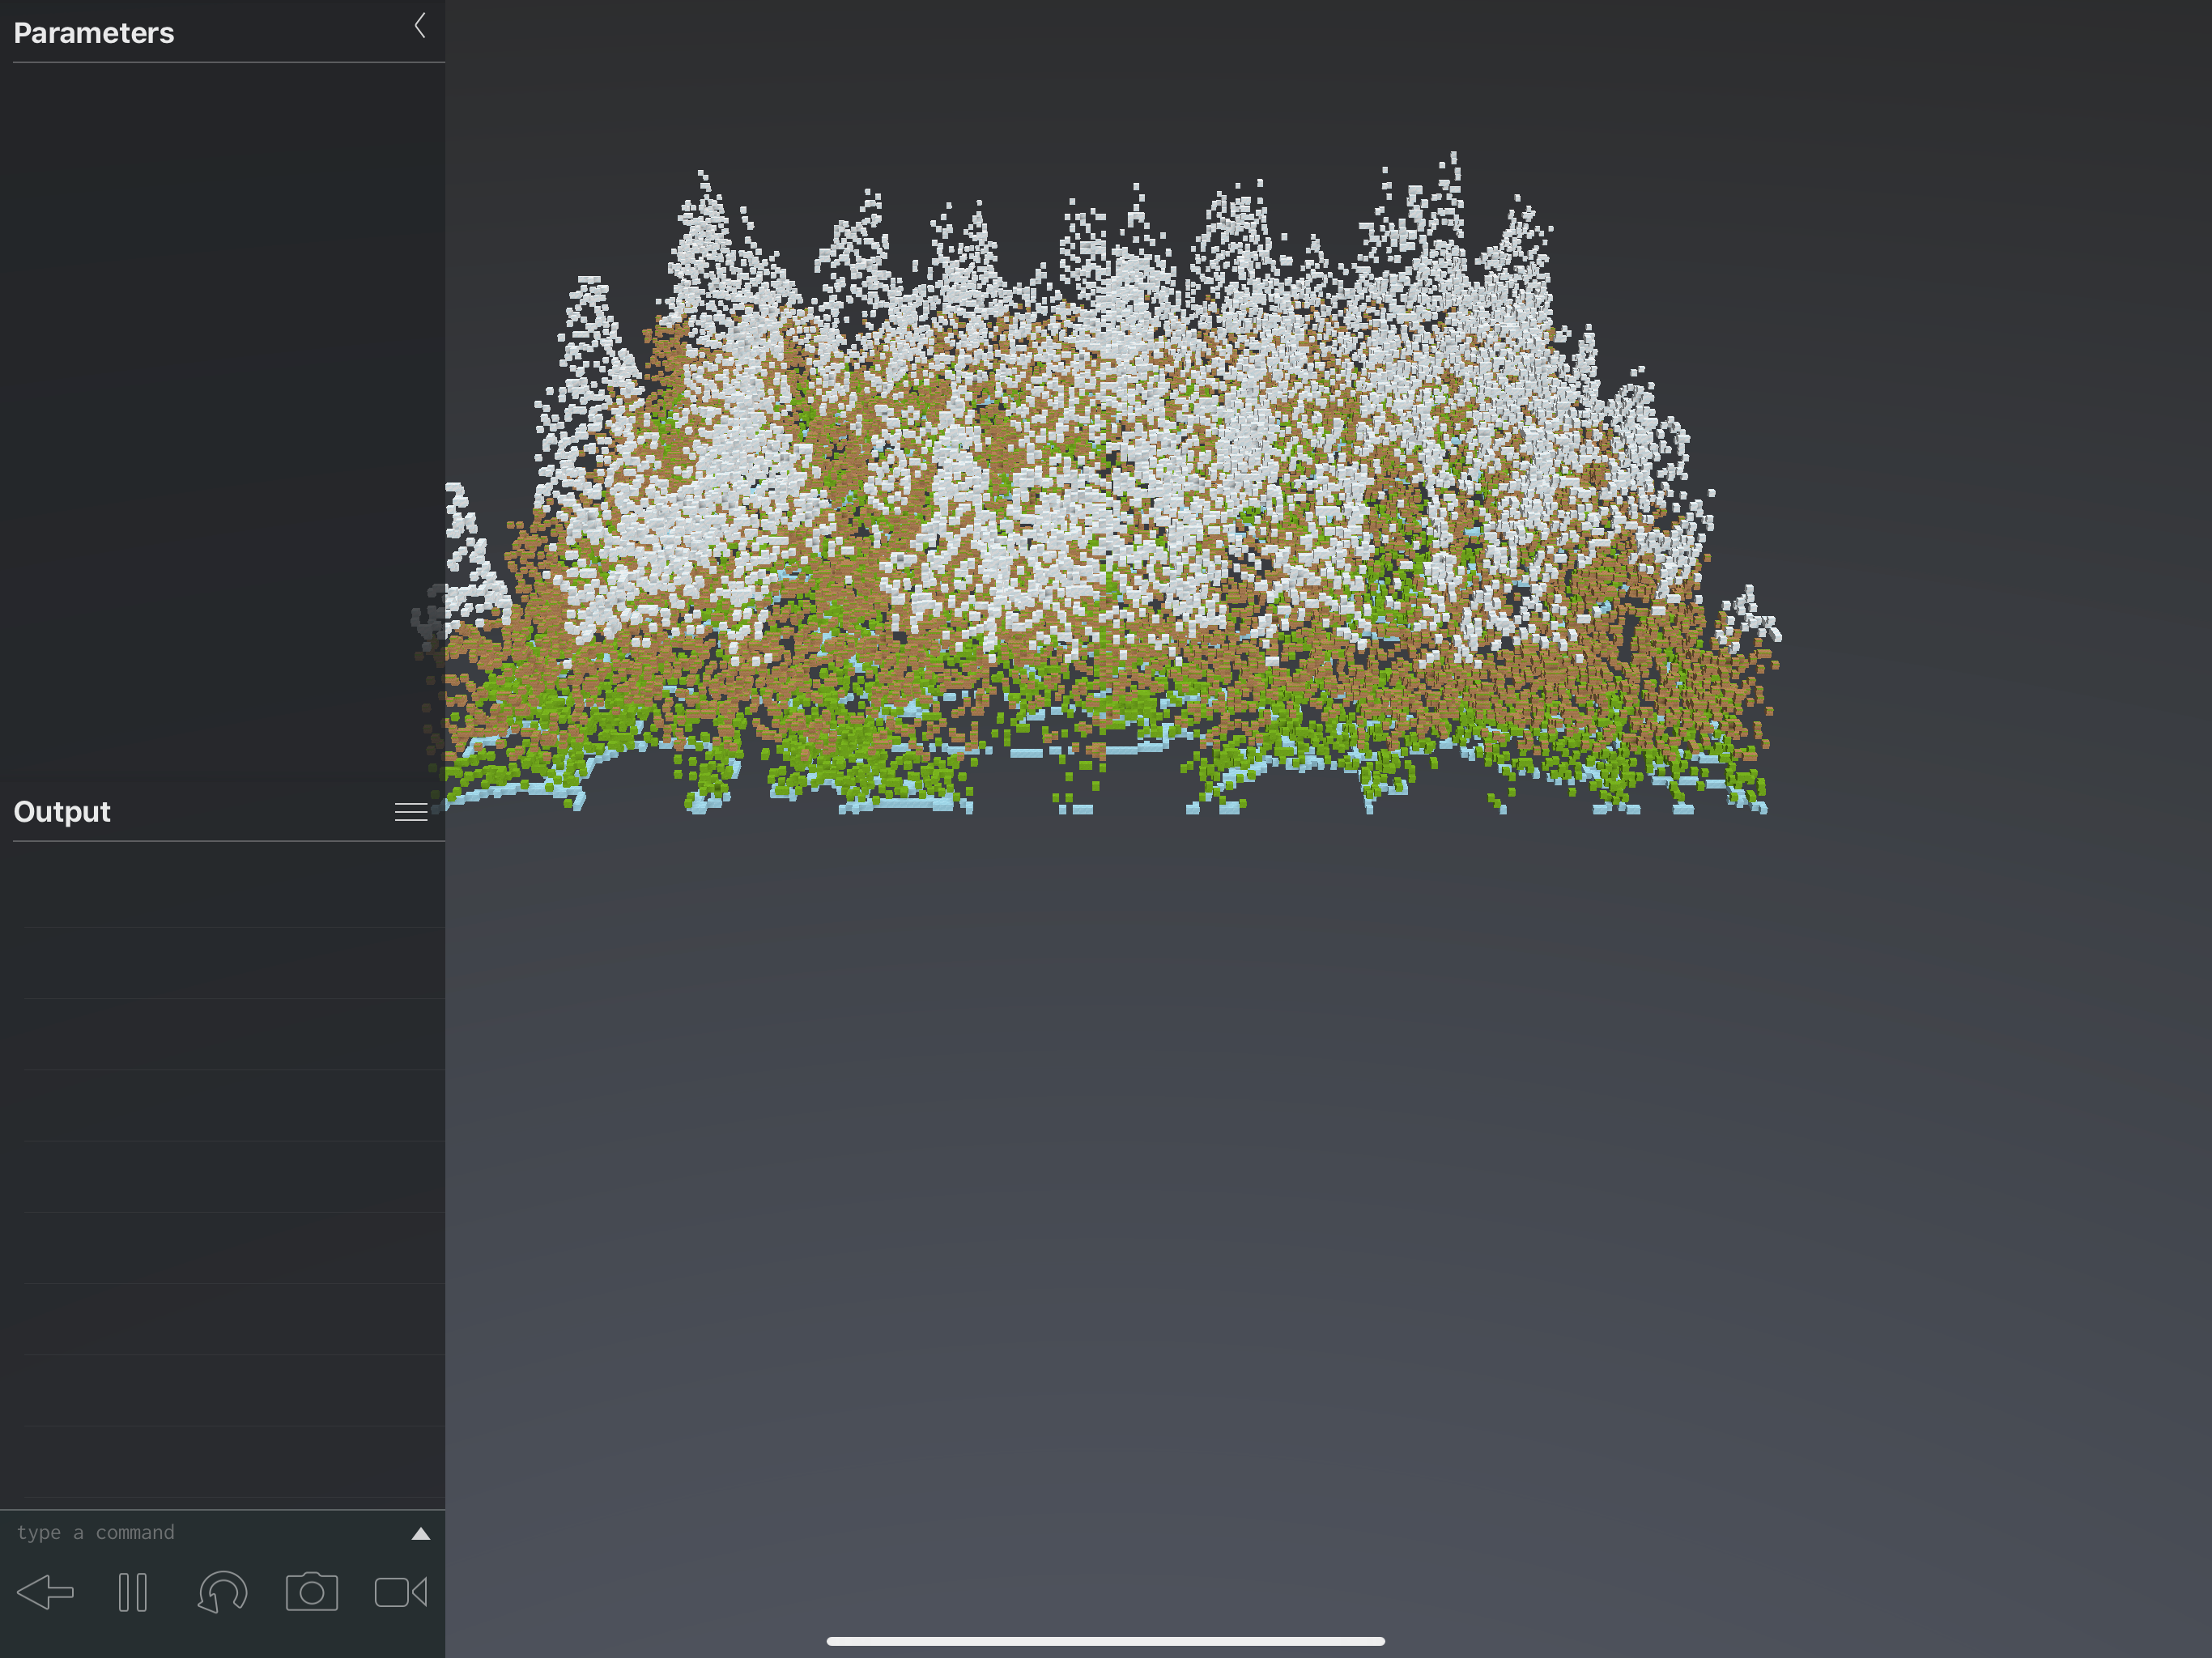
So we see that we need to use pretty small values. What about 1/2000?
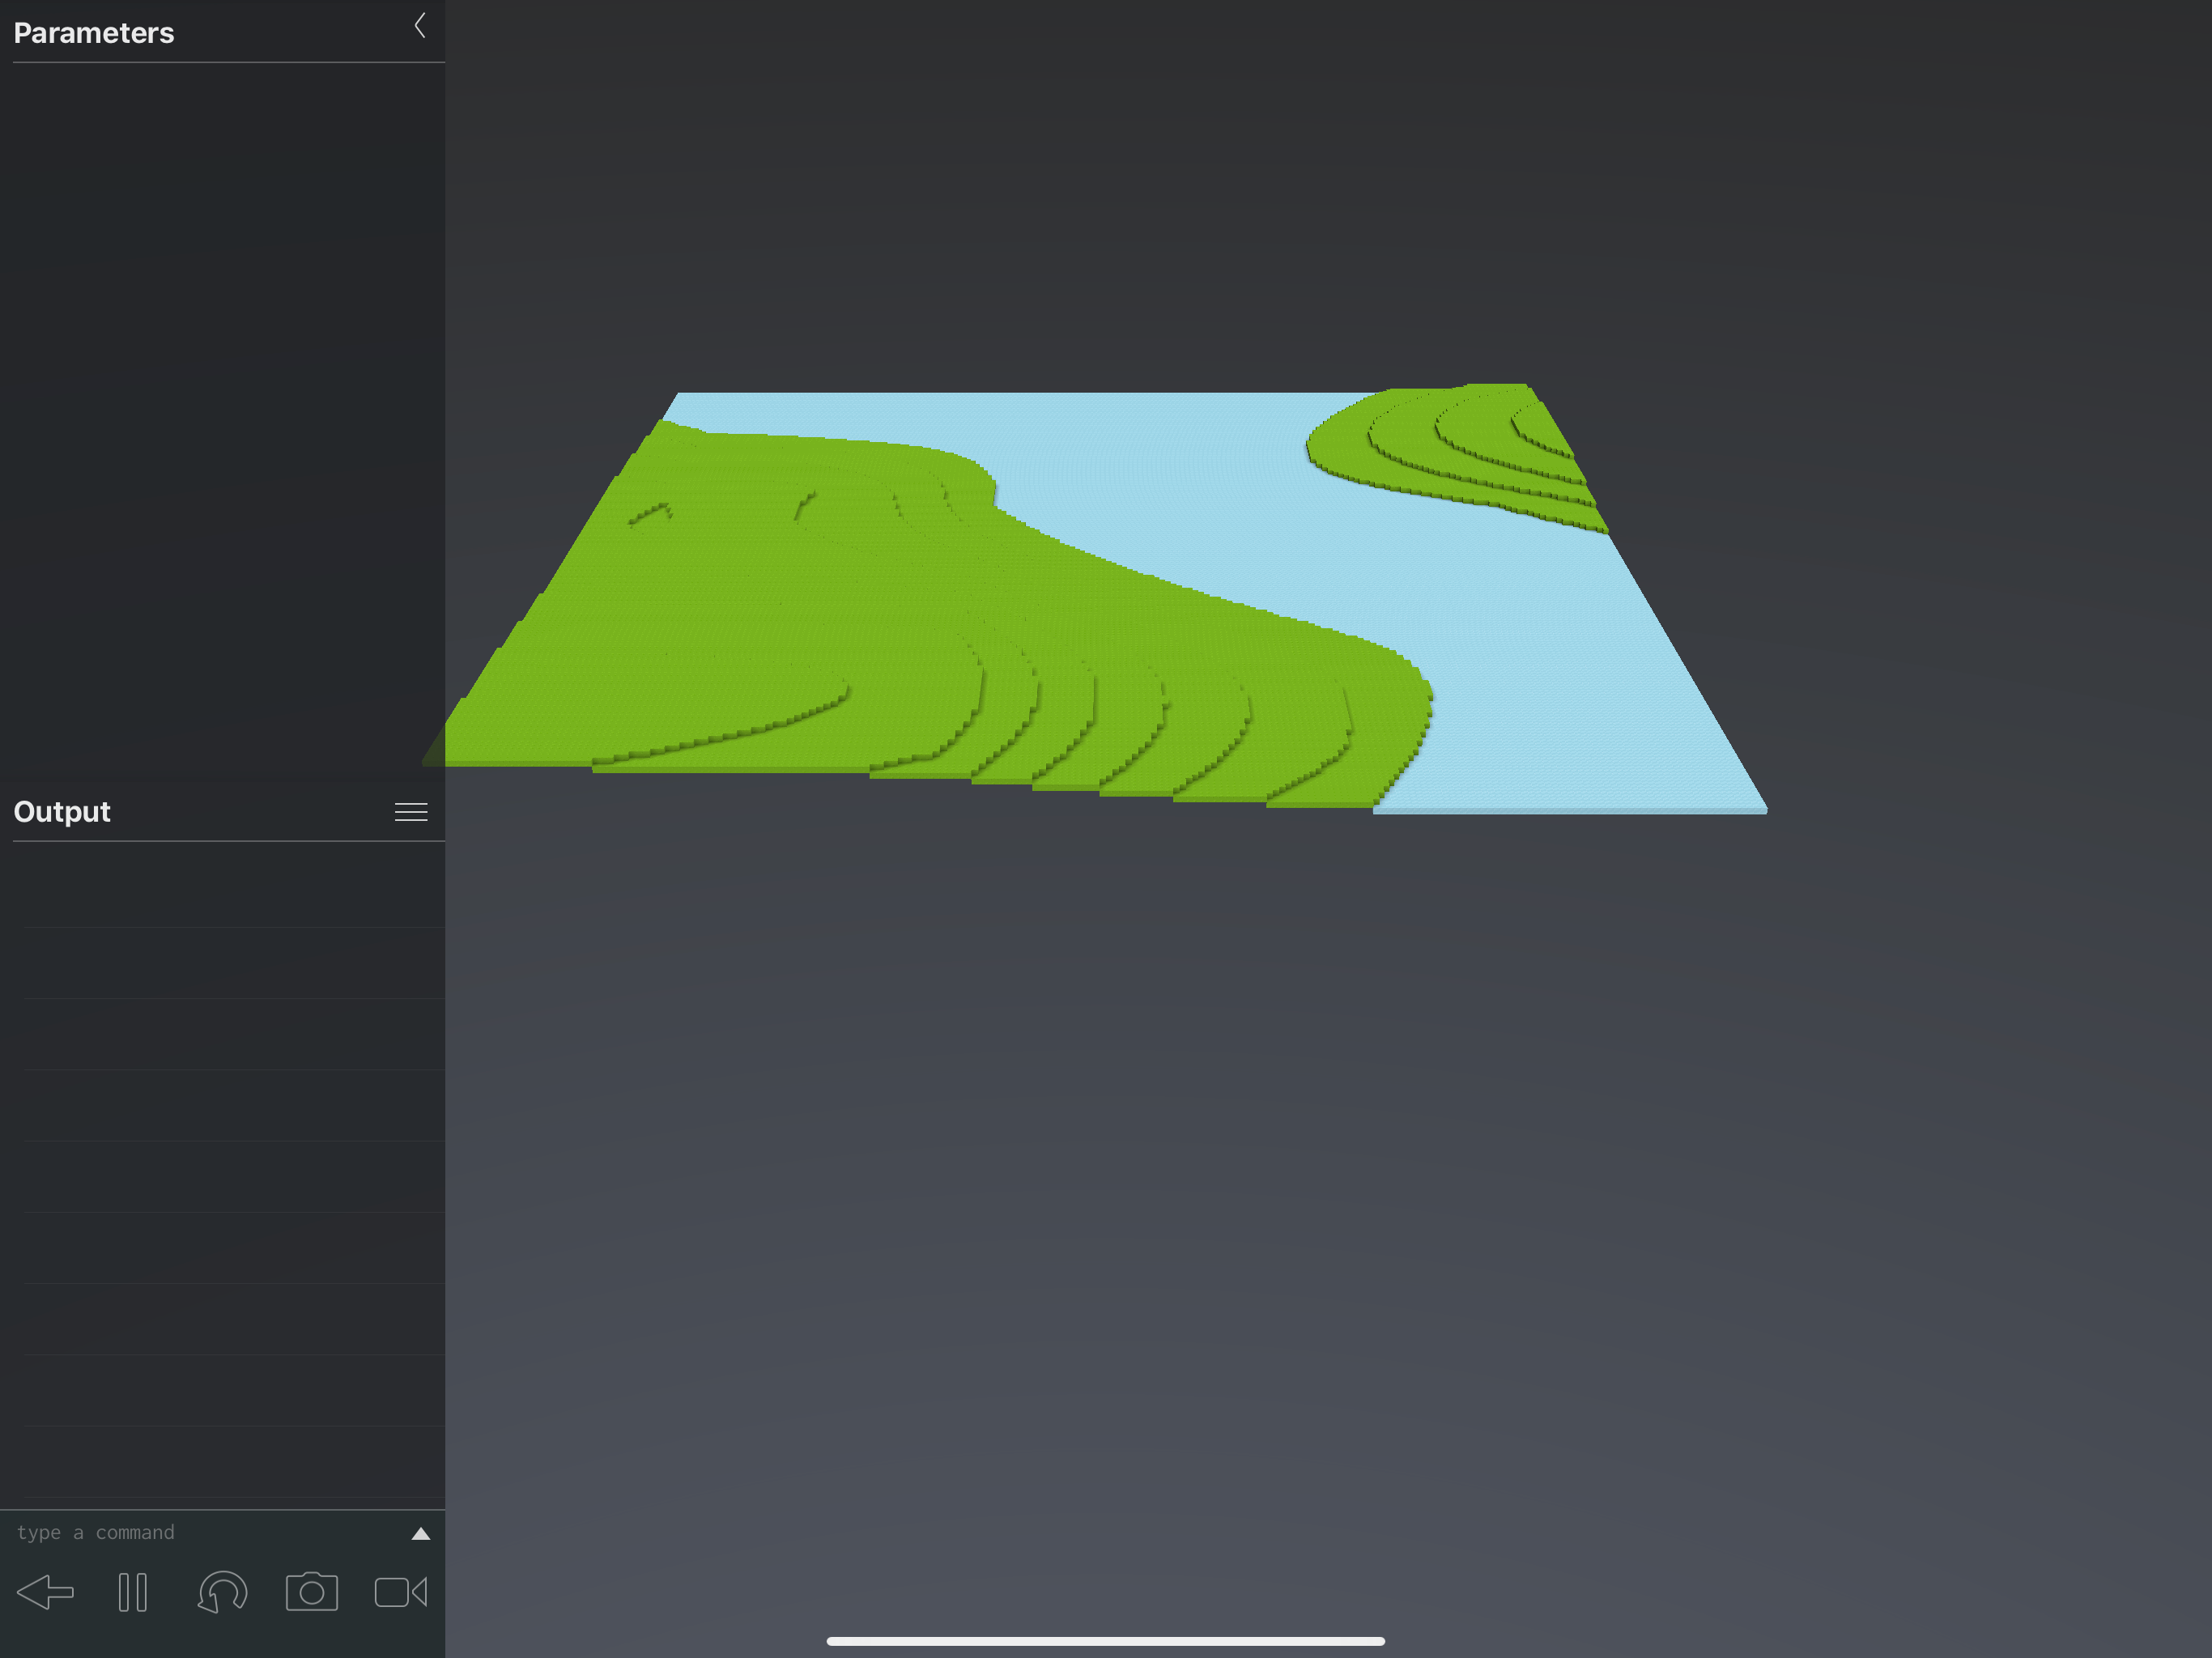
We get a very flat region without much variation. So it seems that tuning the sample distance is a key aspect of getting nice terrain.
And there are parameters to the function as well. You can see where I’ve put code to patch into them to see what happens.
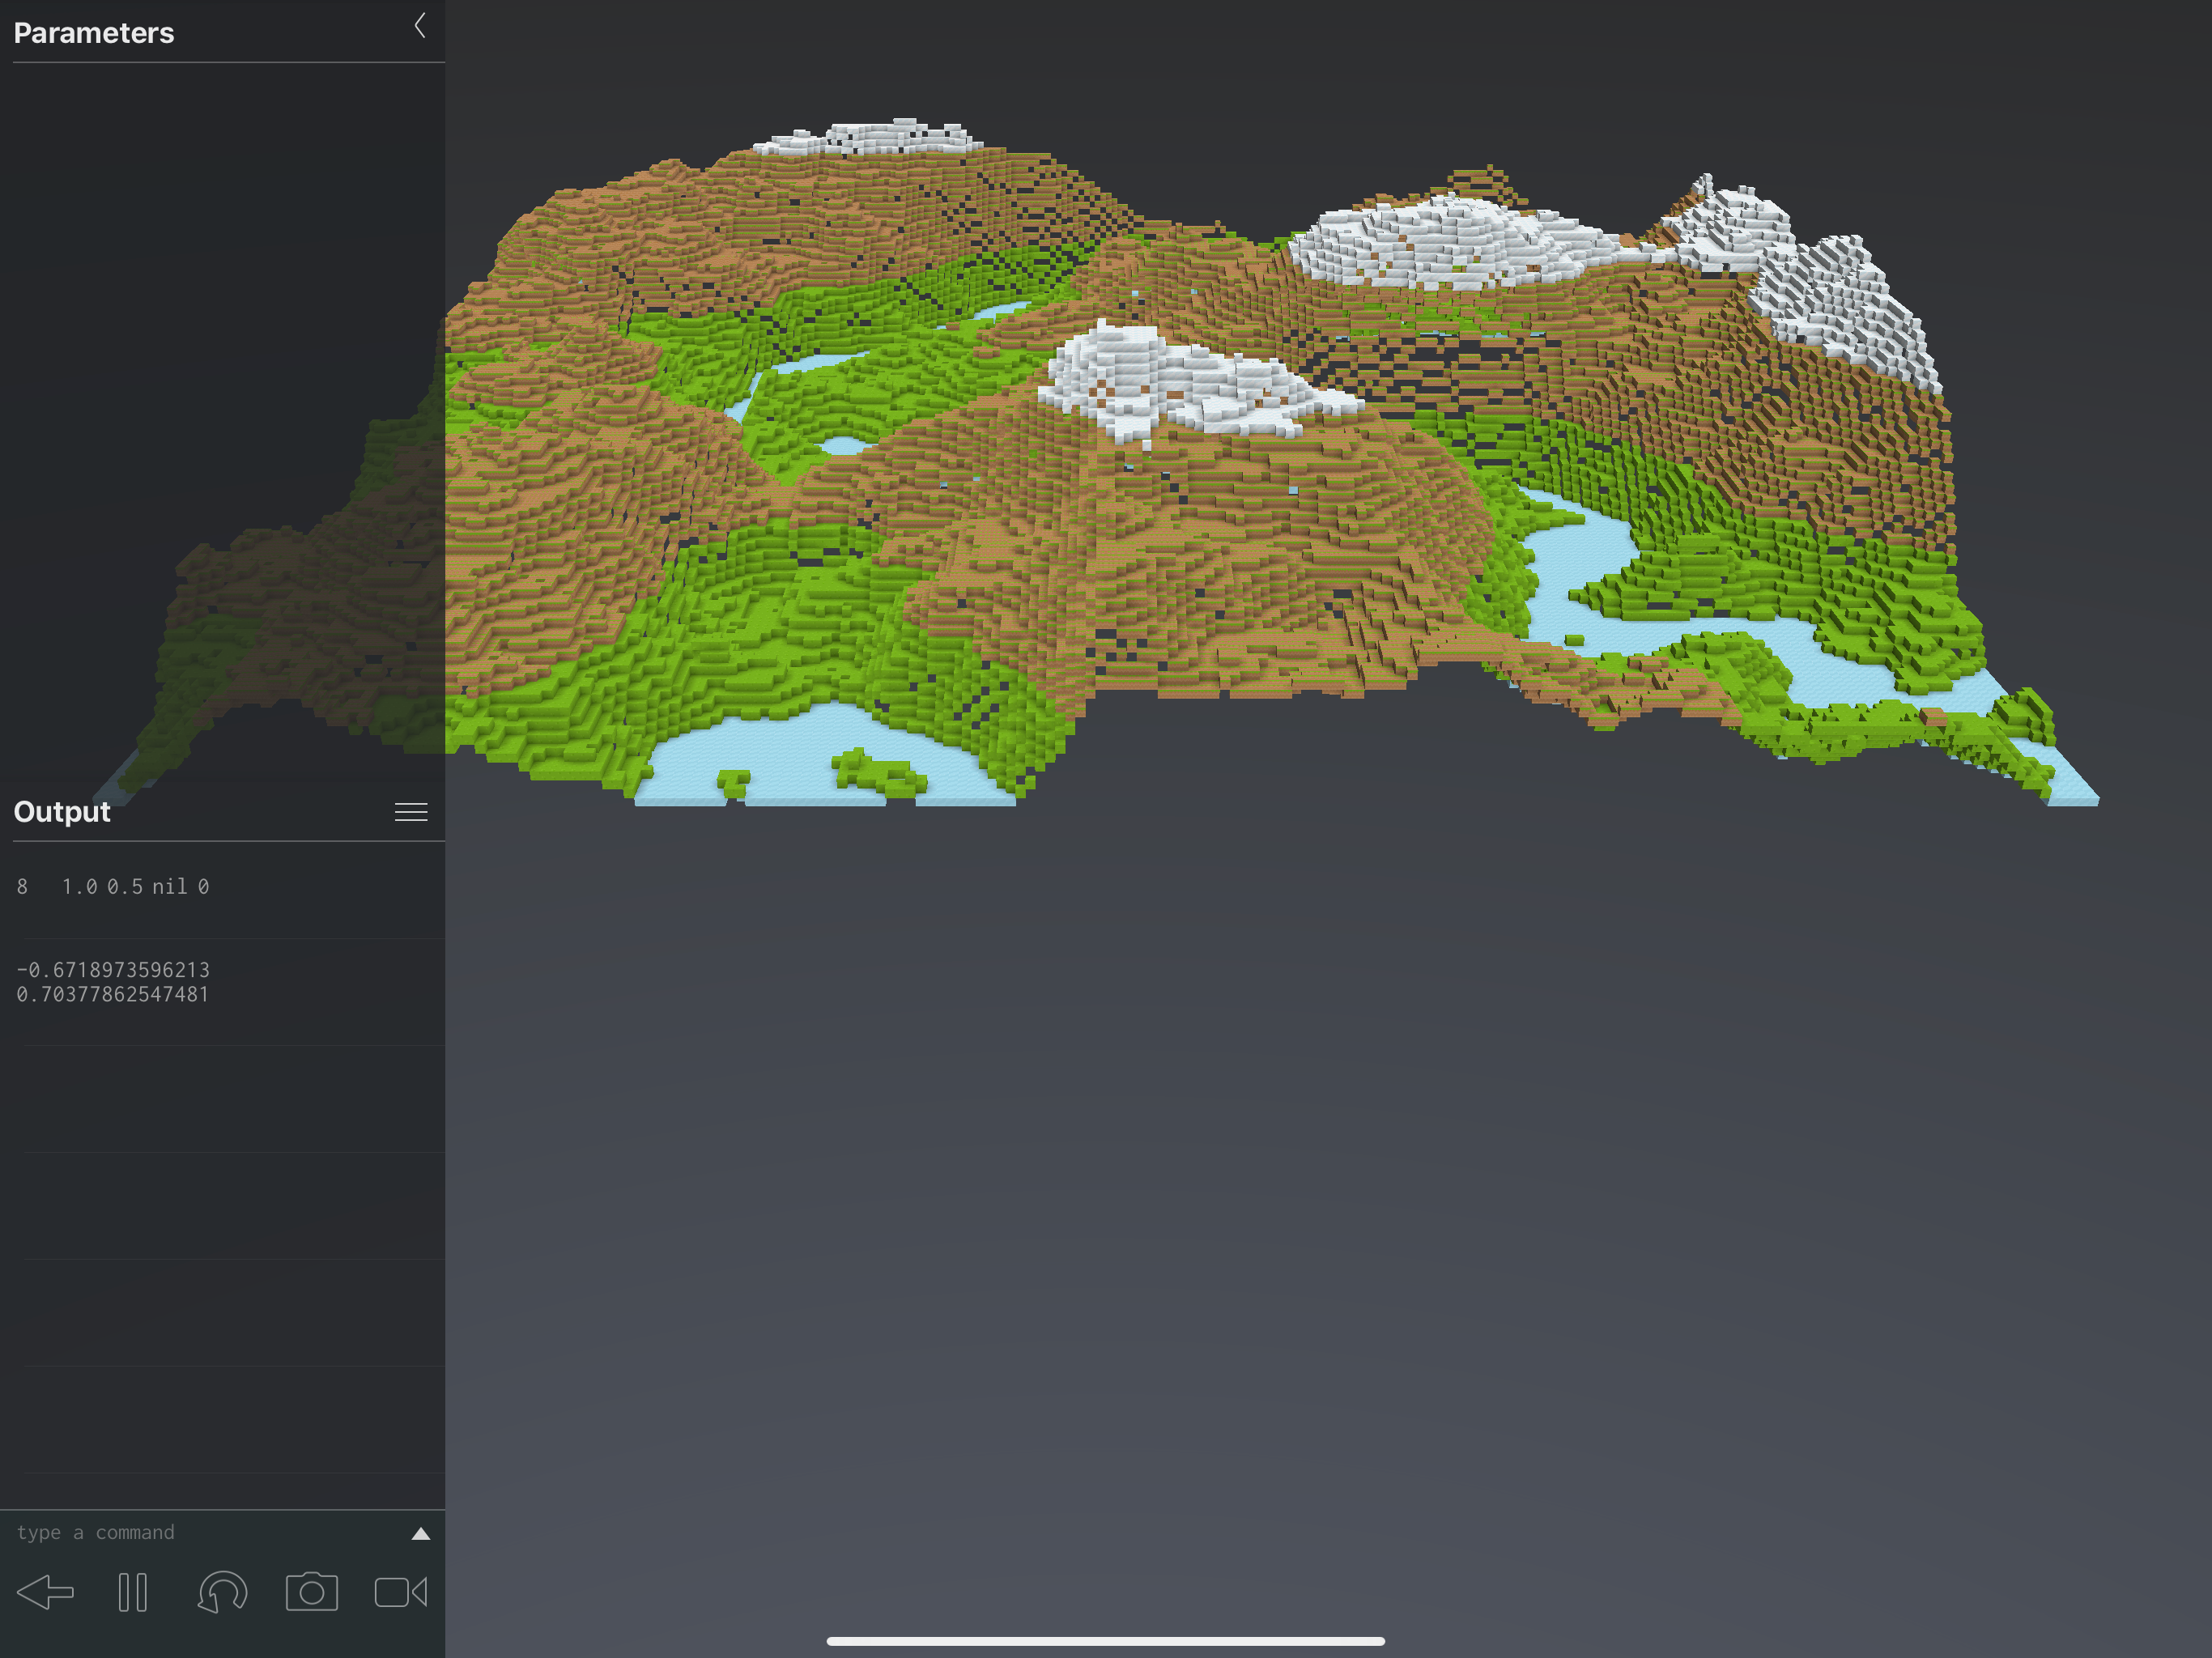
Setting h.octaves to 8 gives us this:
And setting it to 4 gives us this:

Suffice to say, there’s a lot of tuning possible to get what we want. And it will get worse before it gets better: there’s a lot more we need to learn.
The Main Thing …
I was deep in a theoretical study of terrain generation, and a fairly deep decoding of a complex example. I was learning, slowly, but I didn’t have anything in hand to point to or hang ideas on.
Meanwhile, Dave (1707, not any of the other Daves) went ahead and wrote a very simple example and tweaked it until he got something that looked like terrain. Because his example was simple, when it began to produce decent-looking terrain, it was still easy to understand what it was doing, even including the snow-topped hills.
Dave didn’t get stuck, as far as I know, and his simpler idea certainly got me unstuck. It moved me from what seemed reasonable, studying both the theory and an example, to something much more reasonable, an example we can actually understand and grow from.
I blame my pair – I’m doing this alone, so I don’t have a pair – and I’ll need to bear down even harder on finding ways to produce …
Working Software over Comprehensive Documentation
Sound familiar? It ought to. Frequent readers know that working software is quite important to me. I believe that many of the efforts I’ve been involved with would have gone (even?) better with more working software. So I talk about it all the time.
And yet … and yet … here I was, going down the comprehensive documentation path until Dave’s example pulled me back toward real working software.
More Learning - and a Setback
The “done thing” in Codea terrain generation is to use its ability to generate terrain on the fly in a multi-threaded fashion. This is accomplished, roughly, by providing a function to Codea’s voxels:generate function, in text form. (That is, you put your function in a separate tab and give generate the tab name.) The function takes a single argument, a “chunk”, which is probably an instance of volume. You could set all the voxels in the chunk, I guess, but the truly clever thing to do seems to be to build a codea.noise that returns a block identifier, and pass that noise to chunk:setWithNoise(), which iterates the noise over the coordinates in the chunk and populates that voxel with the block the noise returns.
This is all done in separate threads, and on demand: if a given chunk in a large world is not in view, Codea may not call for its generation until later. It appears that the good thing to do is to cache the output of the noise at some high level, to avoid recalculating if the chunk goes out of view and then comes back.
Unfortunately the setWithNoise function is entirely undocumented, and the details of the various noise objects(?) aren’t well described either. I recently learned that Codea uses “libnoise”, so I’ve been able to glean some info there.
Codea threads run entirely separately: they do not share any globals or other information, as far as I can tell. And if you try to print from these threads, Codea crashes. So I’ve found no way at all to put tracing into the terrain generation to understand how it works.
I did get a useful answer from John Millard, who wrote the terrain examples:
The function chunk:setWithNoise(n) passes the noise tree to the chunk which then runs the noise over every voxel, providing the world-space position of each voxel. The noise evaluates to the specific block type at each of the voxel positions in world-space. The reason for having a noise tree is mainly for performance. You can set each voxel individually in Lua but it would be extremely slow.
I think you can access the chunk position by using chunk.entity.position although I haven’t tested that.
I interpret this as saying that your root noise function wants to expect world coordinates x,y,z as the inputs to the noise getValue function. Whether those coordinates will be integer voxel coordinates or on the 0.5 markers or what, I don’t know. Some if not many noise functions are zero on integer inputs, so it would be good to know.
I had a brilliant idea this morning to write a fake class that emulates a noise, give it a getValue function that traced information, then create a craft.volume, which is probably what a “chunk” is, and then use that fake class’s method to learn what goes on.
That was not to be. A craft.noise is not a class or even a function or table. It is a “userdata”, which basically means a C struct – and Lua code cannot access it at all. So I can’t make a fake noise that prints.
I’m not sure at this instant whether I can even create a chunk and call setWithNoise on it, but if I can’t hook into a noise, what good would that be anyway.
Where does this leave me?
Well, there’s a lot of learning to do and most of it I can do. There are a couple of decent examples of terrain generation this “right” way, and it’s easy, though slow, to write code that calls one’s noise functions and populates space the long, hard way of setting each voxel from Lua code.
With that much, I think one can learn how to set up decent terrain. And the Voxel Terrain example does some other interesting tricks. For example, after it calls setWithNoise to set up the basic terrain, it does some local setting in that chunk, randomly placing trees and caves and such with direct Lua code.
We’re left, at this moment, faced with a somewhat opaque capability, voxel terrain, that is becoming more clear but looks to be holding on to some of its secrets pretty tightly. For now, there’s plenty of digging in we can do, learning with direct code how best to use the noise functions, and how to build interesting objects in our world, and the like.
All of this, of course, gets in the way of producing an interesting game, which, I suppose, is the product we’re working on. Mind you, this is article 14, and each article represents as little as two and as much as six hours work. Let’s call it four hours on the average, which is high. So I’m about 7 work days into this game.
That’s not too bad. I think, though, that I should take roughly this approach for a while:
Terrain generation requires some high-power techniques involving threads and noise functions in order to rapidly build a large world that contains interesting terrain, including underground features, especially if it has to look as natural as a voxel world can look.
But we can readily build a small world, building the terrain the slower way, and focus on getting some visible game elements going. If I can do that in, say, 12 more hours, I’ll have a bit of a game built, all by myself, in two work weeks. Not too bad.
We’ll shoot for that. Now I need to have a meeting with myself and figure out some game stuff. This would be a lot easier with someone to talk to about the product.
See you soon!